How to get started with my Django template
Posted on Tue 31 December 2019 in Python • 10 min read
Table of Contents
In this article I'll show you how you can use my Django Template to quickly create and get running a basic Django app.
The purpose of the article is not to teach anyone how to create a Django app from start, there are many other great resources out there for that. I have linked to some of them in the references section at the end of this post. If you're new to Django, I encourage you to first learn how to build a Django project from scratch before using any templates.
The intention of this article is to help you to quickly create a basic Django app with some more batteries already in place. It is also something for myself to refer back to in some of my upcoming Django articles, if people want to code along. I will try to base many of those articles on the app we build here.
A few words about the template
The template is a Django project that I’ve put here on GitHub. After setting up a few Django apps via tutorials I wanted a template with the basics I thought I would need in most of my Django projects.
Some of the features included are:
- A pages app
- An users app with a custom user model (email instead of username)
- Django debug toolbar (only in development settings)
- Docker files for spinning up containers (python and postgresql)
- Basic tests for pages and users
- Different settings files for development and production
As you can see I use a docker based environment when developing in Django. But I’ll also talk about how to build the app in this article if you don’t want to use docker. I haven’t tried this docker setup that I have here on any Windows machine yet, so I don’t know how that would work there.
Site Pages
The template contains a pages app to hold static pages like Home and About.
Register/login/logout
So after setting up a new app with this template, we have a register/login/logout system with email verification built on Django-allauth. In the development environment that we’ll be using here the emails will just be printed out to the console, so no need for any SMTP server.
Docker files
If you want to use Docker with this template there are three files to help you with that. The only requirement you should need to have on your own machine is Docker Desktop At the time of writing this, I have only tried this dockerized environment on Mac.
There are one Dockerfile and two Docker-Compose files (one for dev and one for prod). We will just be using the dev one in this article.
Makefile commands
After splitting up the Docker Compose file in a dev and a prod version, I realized that the docker commands became very long. So I created a Makefile with some common commands that I wanted to use. For example:
- Start the container (will also restart any running container)
- Start and rebuild the container
- Run Django tests within the container
- Run commands from the command line within the container
Again, I have no idea if it possible to use the Makefile commands on Windows. But if you look at the contents of the Makefile, you can copy/paste the commands from there and use them in any Windows command file.
Create a new repository based on my template
My Django template at GitHub is configured as a so called GitHub "Template Repository". That means, assuming you have a GitHub account, you can go to the following link to create a new project repository in your own GitHub account based on my template:
Create a Django project based on my Django template
Note: For some reason the link above will give a 404 error if you're not logged into Github.
Choose a Repository name, description and if you want it to be Public or Private.
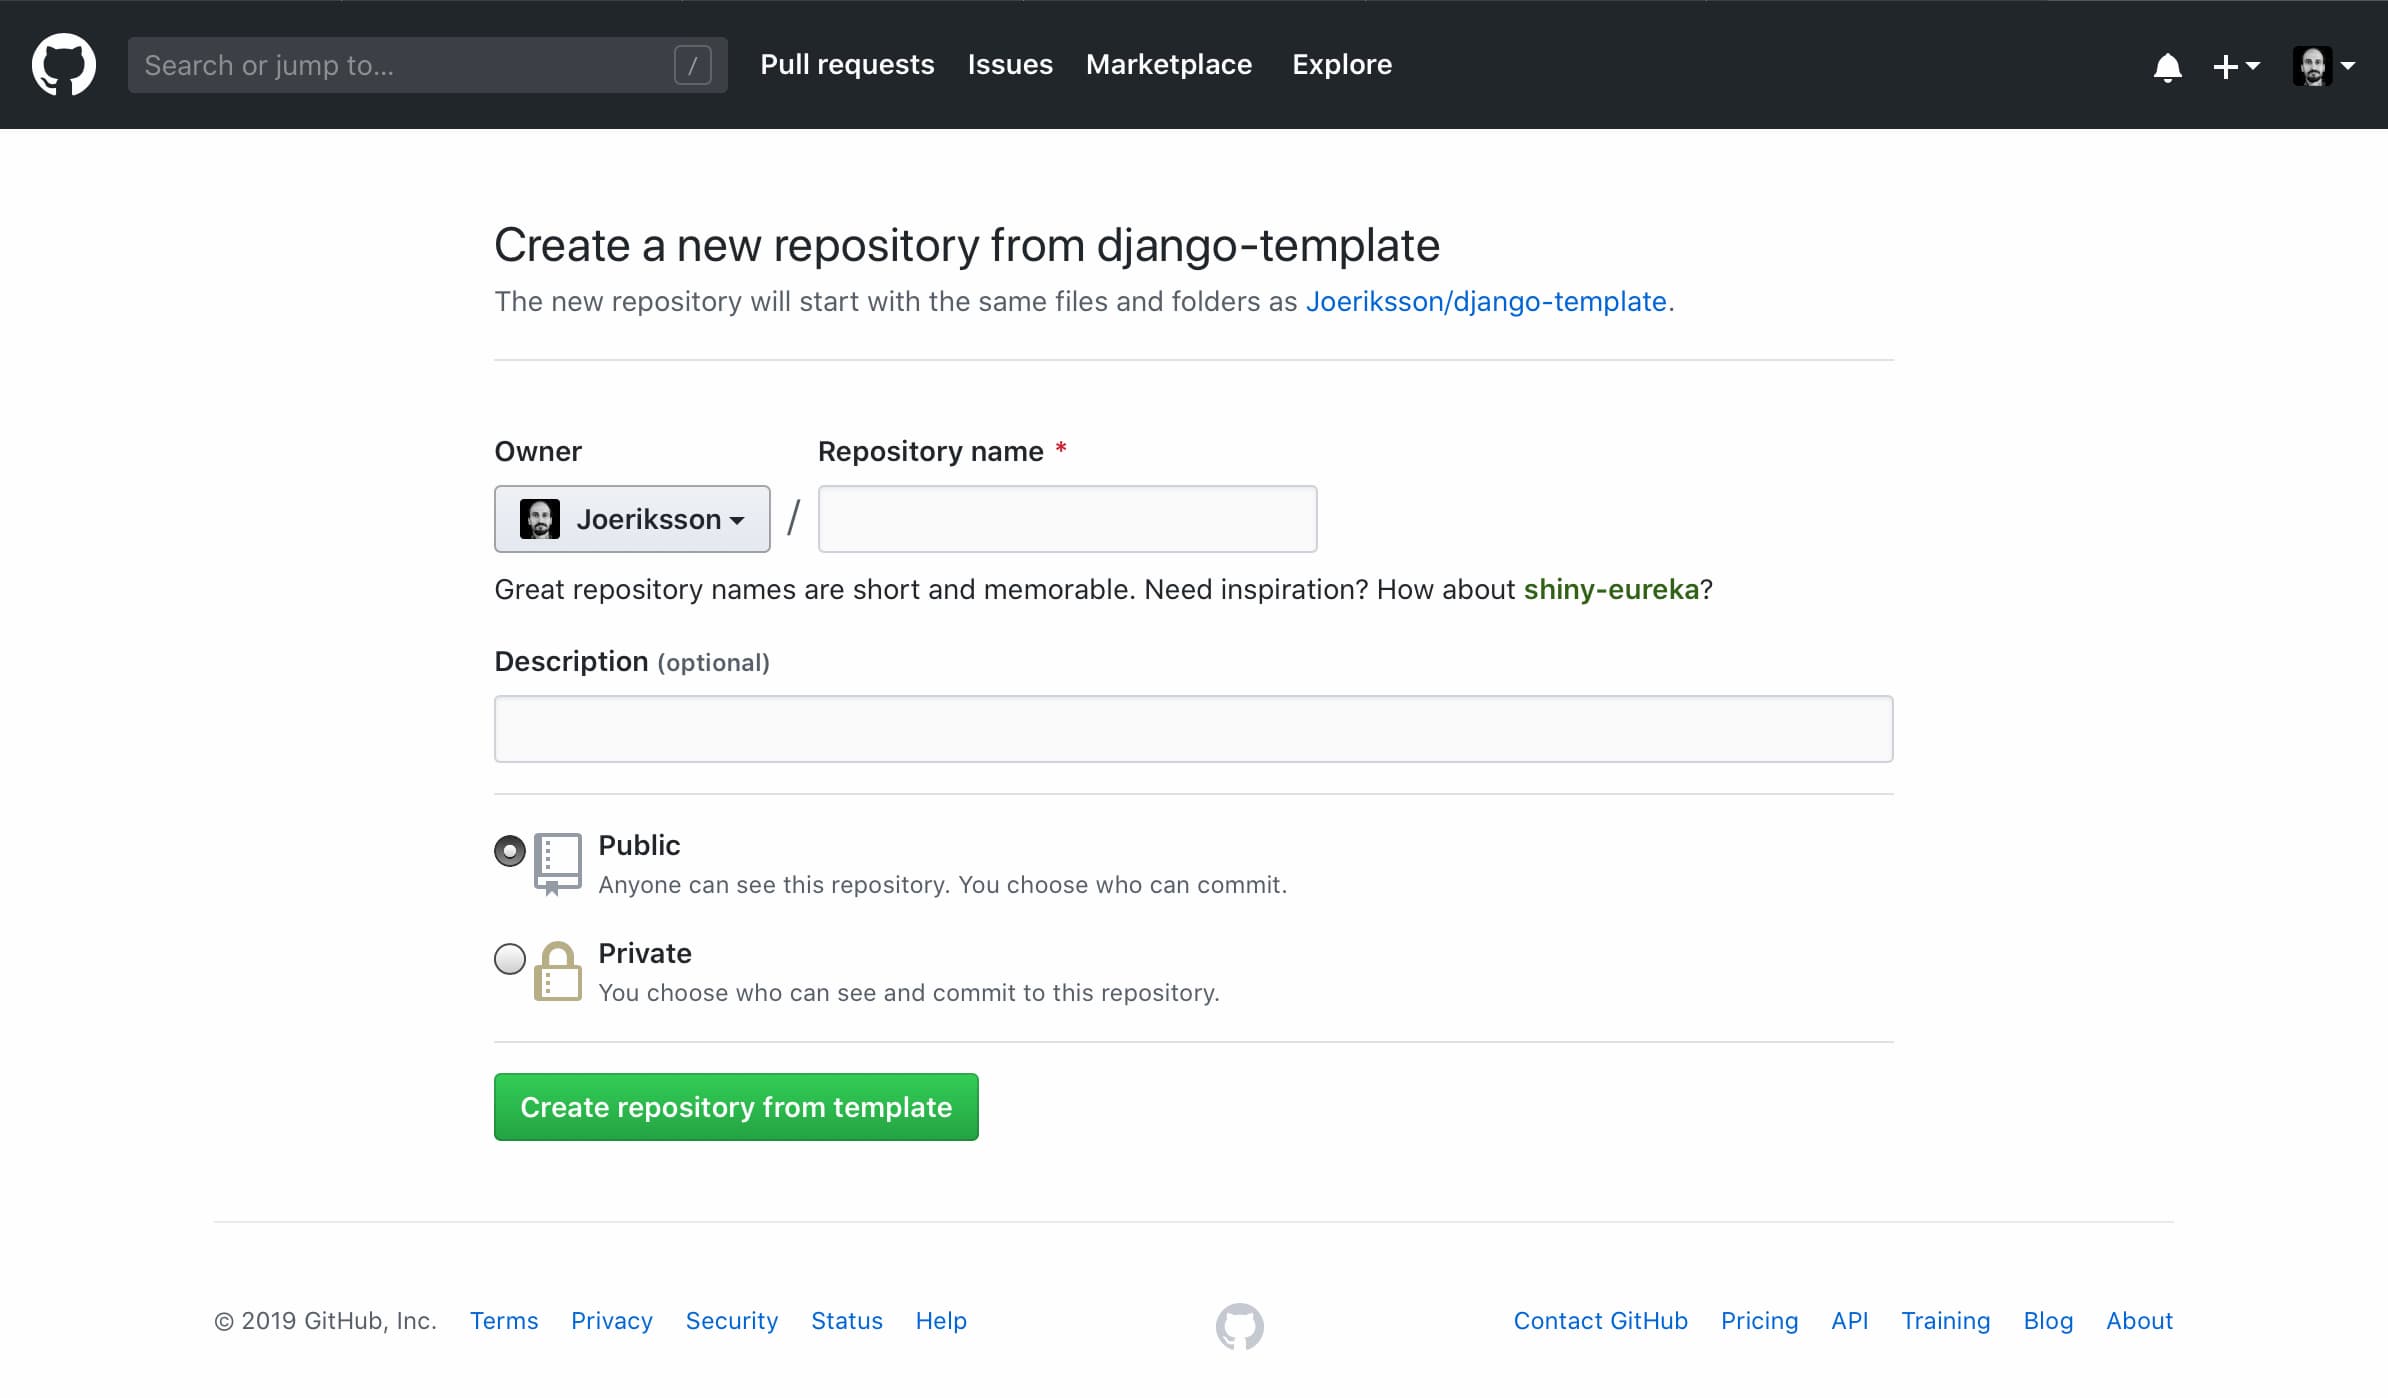
Clone your new repository to you local machine
You should now have your own new repository based on my template in your GitHub account.
You probably already have a folder on your machine, where you have your code projects. Open your terminal in that folder, or create a new folder for example on your desktop.
The git clone command that we will do next, will by default create a subfolder within the folder you are located in with your terminal when you run it.
Next we’ll clone the project to our local machine. You can get the URL to use under the "Clone or download" button in your repository.
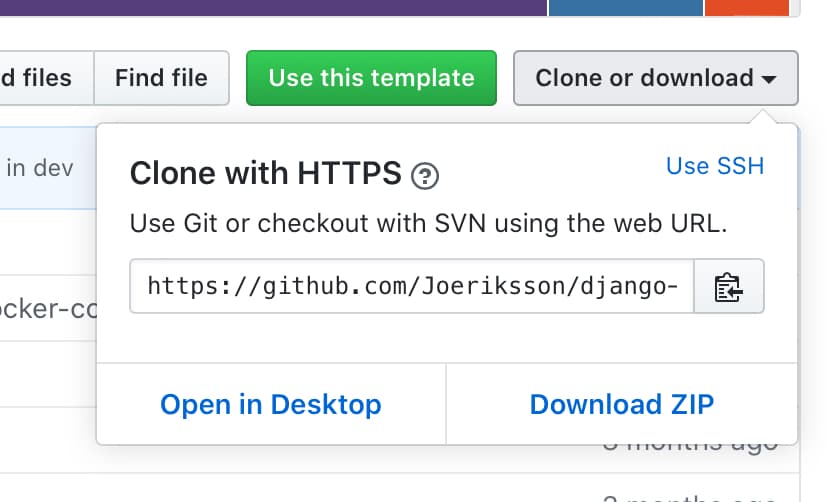
Run the following command in your terminal. Replace with your username and repository name.
git clone https://github.com/<your github username>/<your repository name>
The project files should now be present in a folder with the same name as your repo name, within the folder where you ran the git clone command.
Setting up the local development environment
Since there are many different IDE’s to use when developing in Python, and what you use might be different than mine, I'll use the terminal for setting things up and running with different commands throughout this article.
Quick start
If you already have experience in the techniques in this article, and don’t want to go through step-by-step, you can just follow the instructions from step 3 and forward, here in the Readme file from my Django template repository, and then jump to the "Conclusions" section.
Creating an .env file
This project uses a .env file to store certain settings that you don’t want to end up with in your GitHub repository. For example the Django SECRET_KEY, and any username and passwords needed for external dependencies.
Open the terminal in your newly created project folder and run the following command:
touch .env
Use your favorite text editor and type the following parameters into the .env file.
Note: We will not be using SENDGRID in this article, so you can just type e.g. abc123 for both username and password.
For SECRET_KEY you can use the Secret Key generator for example at Heroku
SENDGRID_PASSWORD='abc123'
SENDGRID_USERNAME='abc123'
SECRET_KEY=<your secret key>
DEBUG=True
Save the file. Now we are ready to spin up our dev environment with or without Docker.
Note: The .env file is by default included in the templates .gitignore file, so it shouldn’t be included in any git commits. But be sure to check that in your first commit of this project though.
Setting up a project with Docker
(For instructions to setup the development environment without the use of Docker, look further down in this article.)
Setting up this project using Docker is pretty fast, and you don’t need to know much about Docker to get started. Before going through the instructions below you need to install Docker Desktop on your machine.
In this Dockerized environment we will be using PostgreSQL as database. One advantage with Docker is that you don’t need to install this on your machine. We will just use a pre-made image that will be pulled from the repository (via a command in the Docker Compose file). When building this app, you also don’t need to know much about PostgreSQL. It should just work in the container with the commands and settings within the Docker Compose file and Django settings.py.
1. Build the containers
Start by going to your project folder in the terminal. If you’re on a machine that can use Makefile, type the following command:
make dev_build
Note: If you can’t use Makefile on your machine, look within the Makefile and copy the command under the dev_build: section and run it in your terminal.
The make dev_build command will pull down any required docker images not already present on your machine and build the containers described in the docker-compose-dev.yml file.
If all goes well, the results in your terminal should look something like this:
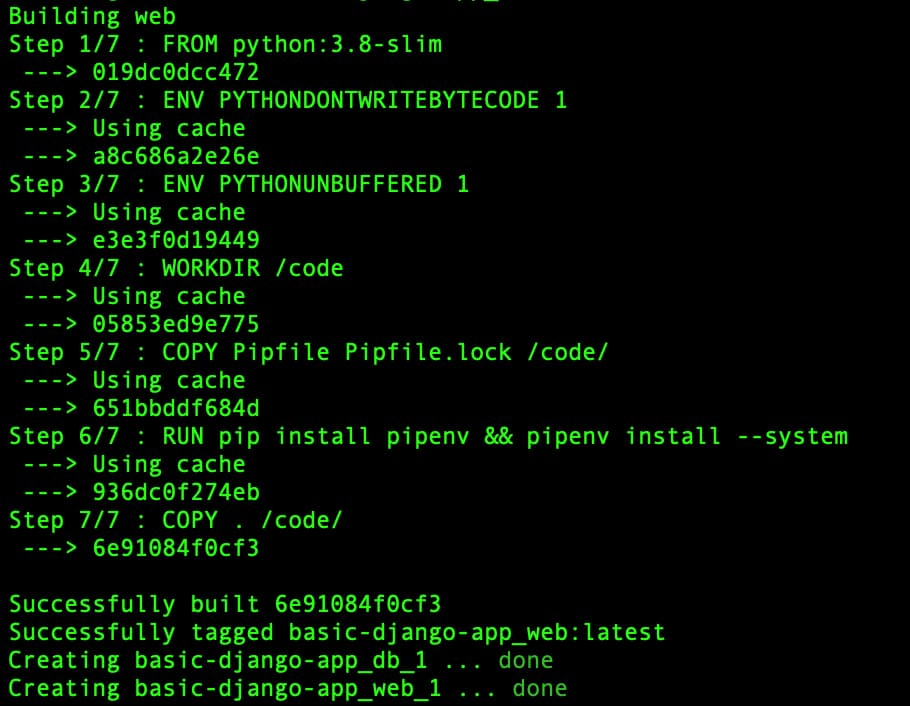
The containers are now up and running. One is running the web, and the other an instance of PostgreSQL.
2. Create a virtual environment and install requirements
To create a virtual environment within our Docker container and install the requirements from the Pipfile, run the following command from your terminal:
make dev_web_exec cmd='pipenv install'
Note: Again, if you can’t use make commands on your machine, have a look in the Makefile for what command it represents
We now need to restart and rebuild the Docker container. You can do that again by using the following command:
make dev_build
3. Create migrations
Currently there are some migrations that needs to be done to the database. For example the users model.
make dev_web_exec cmd='python manage.py migrate'
After running this, to check that everything works, check in your browser so that you see a start web page at http://127.0.0.1:8000
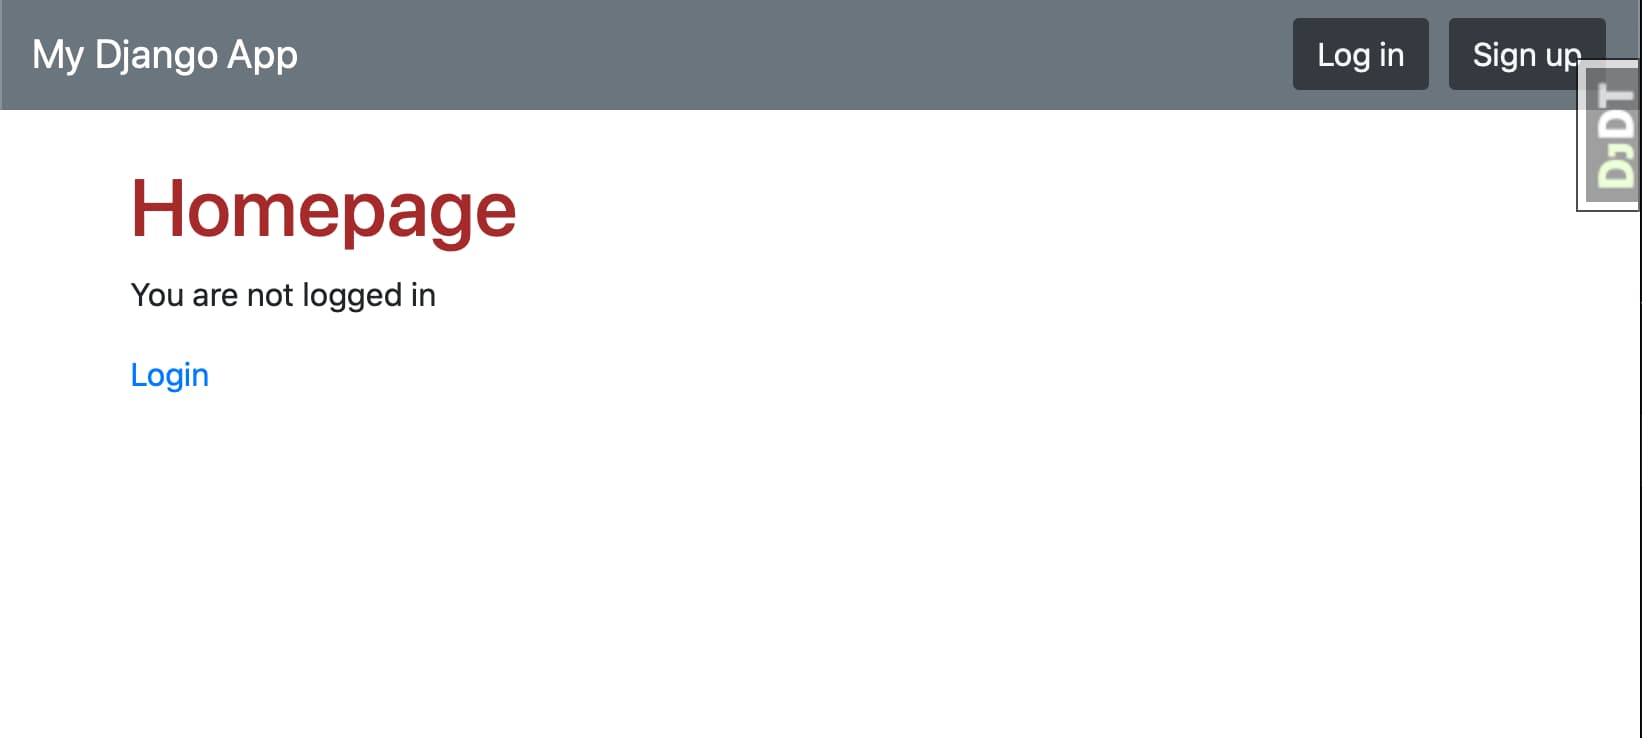
4. Create a superuser
To be able to get into Django Admin and use it, we need to create a superuser.
make dev_web_exec cmd='python manage.py createsuperuser'
Follow the prompts to choose a username, email and password. To see if it all works go to http://127.0.0.1:8000/admin in your browser and login with the super user account you just created. It should look like this.
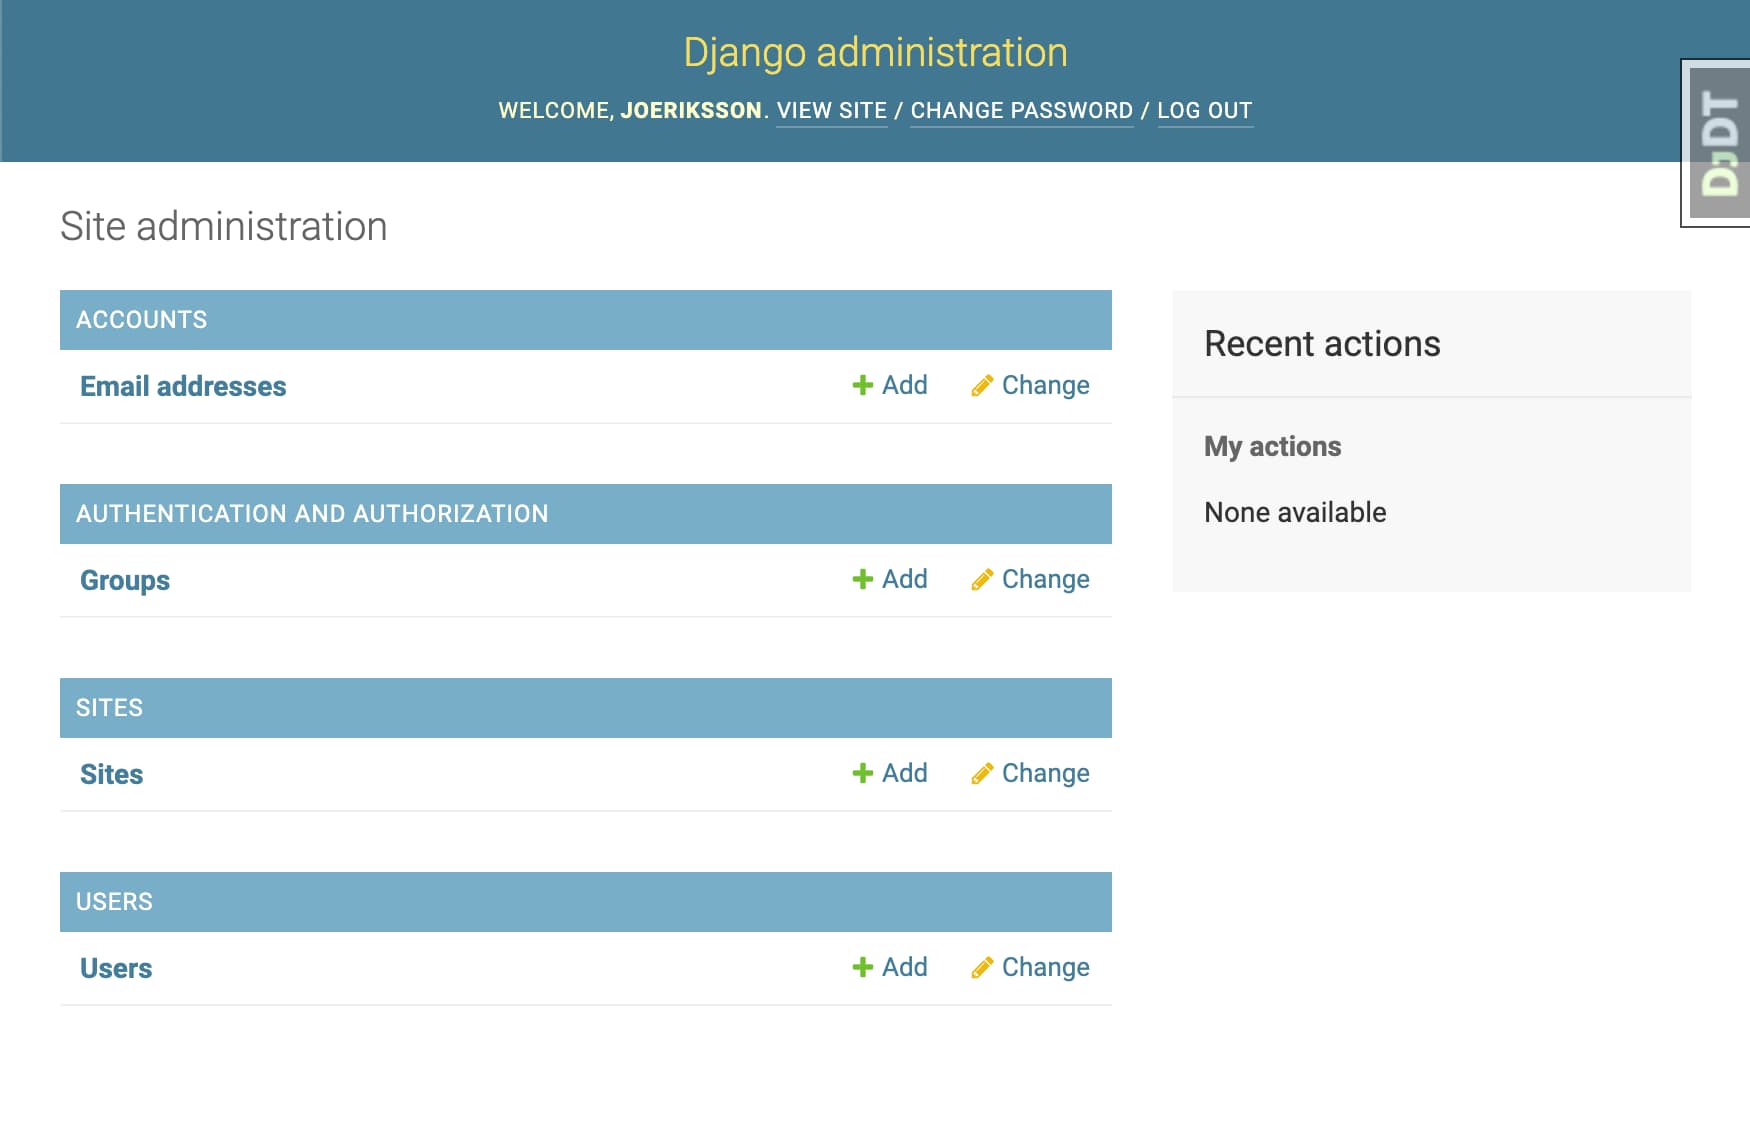
We are now ready to create the basic app. Jump to the "Conclusions" section to get started.
Setup a project without docker
This section describes how to spin up the Django project without using Docker. For simplicity we will also not use PostgreSQL since that would require a whole lot of setup outside of the scope of this article, and instead use the simpler SQLite.
1. Change the project to use SQLite
To use SQLite instead of PostgreSQL in this project, open the project/settings/base.py file in a text editor and find the following section:
# DATABASES = {
#     'default': {
#         'ENGINE': 'django.db.backends.sqlite3',
#         'NAME': os.path.join(BASE_DIR, 'db.sqlite3'),
#     }
# }


DATABASES = {
    'default': {
        'ENGINE': 'django.db.backends.postgresql',
        'NAME': 'postgres',
        'USER': 'postgres',
        'PASSWORD': 'postgres',
        'HOST': 'db',
        'PORT': 5432
    }
}
Uncomment the first DATABASES section by removing the # at the start of each line. Delete the second DATABASES section and save the file.
2. Create a virtual environment with Pipenv
Open the project folder in your terminal and run:
pipenv install
Note: You might need to install pipenv first by running
pip install pipenv
This will create a new virtual environment for your project and install the requirements from the Pipfile. To activate the virtual environment use:
pipenv shell
3. Create migrations
There are some pending migrations to execute into the database. For example the user model needs to be migrated, as well as some admin models.Currently we actually don’t have any database either. So run the following command to accomplish this:
python manage.py migrate
4. Check that the project can run
Start the project and check that it runs, by running the following command in your terminal:
python manage.py runserver ---settings=project.settings.development
Note: Normally you would just need to run
python manage.py runserver. But since this template has split its settings between dev and prod, we need to specify which settings file we want to use with the--settingsparameter.
Check in your browser that you see a start web page at http://127.0.0.1:8000

If everything works and you see the webpage above, stop the server by pressing CTRL-C in your terminal window.
5. Create a superuser
To be able to get into Django Admin and use it, we need to create a superuser.
python manage.py createsuperuser
Follow the prompts to choose a username, email and password. Spin up the server again.
Python manage.py runserver ---settings=project.settings.development
To see that it all works go to http://127.0.0.1:8000/admin in your browser and login with the super user account you just created. You should end up on a web page that looks like this.

We are now ready to create the basic app. Jump to the "Creating the basic app" section to get started.
Tests
My Django template contains some basic tests. You can find them in the pages app and the users app in a file called tests.py. To run them, make sure the containers or server is running, and execute the following command:
Within docker:
make dev_test
In an environment without docker:
python manage.py test
Conclusions
In this article I've shown you how to get started building a Django app based on my Django template, both using Docker and how to do it without Docker. The template makes it quick to get up and running with a new Django app that has the user account management ready, and possibilities to plugin other providers like GitHub or Google login. Also there's already a separation between development and production settings. In development you have for instance the Django Debug Toolbar.
My intention with this article is to have something to refer to in upcoming Django articles, if readers want to code along and need to quickly have a basic Django app to start with.
Resources
- William Vincent and his book Django for professionals where I learned most of the things I am using in my template.
- Django-allauth - Django authentication, registration, account management and more.
- Writing your first Django app - tutorial by the Django Project
- Django Girls Tutorial
- There is 3 Django courses in TalkPython's 100 Days of Web in Python
Let me know on Twitter if I can improve this article, or if you have other resources to help out with understanding this topic.